
MIB Smithy
Conceptual Tables
Creating a Table
To create a table in MIB Smithy using the New Table Wizard, use the Project Tree to select the module in which to create the record -or- one of its records that is the desired parent for the new table. Then, you can either: use Insert →  Table from the main menu; click on the New Table Button in the Toolbar; or right-click on the desired parent record within the Project Tree and use its New → Table menu. MIB Smithy will launch the New Table wizard with a unique, automatically assigned subidentifier, and then guide you through the process of creating the table. Each step of table creation with the wizard is detailed below.
Step 1 - Table Type, Prefix and OID
For step 1, you must choose the Table Type and OID Value for the table OBJECT-TYPE record. The table type can either be New Table to indicate that the table will have its own indexes, or Augmentation to indicate that the new table is intended to augment (that is, extend in a one-to-one row relationship) to an already existing table, or Sparse Augmentation (PIB modules only), to indicate that the new table should sparsely-augment (through the EXTENDS clause) an existing table. Selecting Augmentation or Sparse Augmentation allows you to indicate the name of the existing table that is to be augmented, which should be specified as the row OBJECT-TYPE for that table.
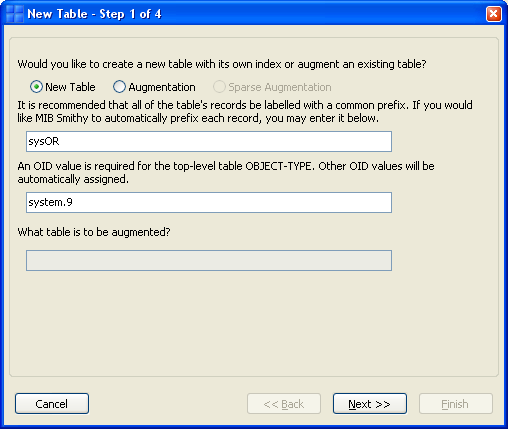
Figure - New Table Wizard - Step 1
The Prefix property is optional, and simplifies the task of consistently naming the different records involved. It is highly encouraged, though not required, that all records of a table share a common prefix. This allows them both to be recognized as being related to one another and minimizes the chance of naming conflicts with other records unrelated to the table.
Step 2 - Table, Row and Type Names
The next step in creating the new table is to specify the names of the conceptual table and row OBJECT-TYPEs as well as the name of the ASN.1 SEQUENCE type assignment that will define the table structure. If a prefix was given in the preceding step, then these form fields will already be filled out for you, but will allow you to make any necessary modifications. Otherwise, you can enter the names manually, and MIB Smithy will attempt to name subsequent fields automatically using common naming conventions.
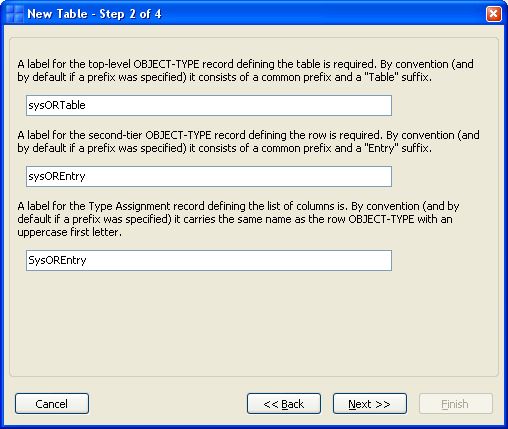
Figure - New Table Wizard - Step 2
By convention, the table OBJECT-TYPE name ends in a "Table" suffix while the row OBJECT-TYPE name ends in an "Entry" suffix. Both must be valid identifiers starting with lowercase letters. The Type Assignment for the SEQUENCE structure is given the same name as the row OBJECT-TYPE, but with the first letter capitalized (it must be a valid identifier starting with an uppercase letter). The New Table wizard will allow you to use names that do not follow this convention, but it will not allow you to specify names of already-existing records.
Step 3 - Defining Columns
The next step in creating the table is to indicate the columnar objects and their datatypes. For new tables, you can also indicate at this time which columns of the table will be considered indexes (whose values uniquely identify a particular row in the table). For augmenting tables, columns of the table cannot be marked as indexes, since the indexes are inherited from the augmented table.
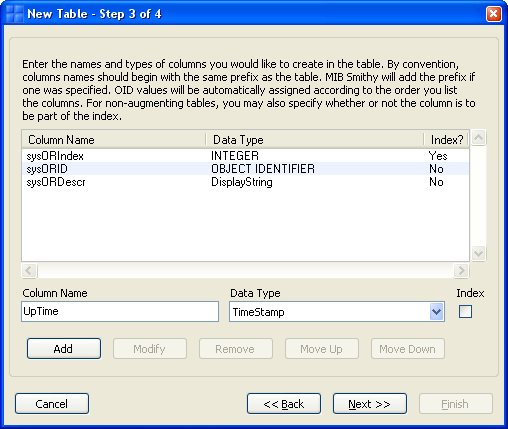
Figure - New Table Wizard - Step 3
If a prefix was given during the first step, then any columns added to the list at this stage will automatically be given that prefix. As in the example above, clicking the "Add" button will add a column named "sysORUpTime" because the prefix specified in step 1 was "sysOR".
Also note that certain datatypes cannot be used as indexes (notably the "Counter" datatypes -- Counter32, Counter64), and the wizard will not allow you to mark columns as indexes with those types.
Columns will be automatically assigned subidentifiers beneath the table and row OBJECT-TYPEs according to the order they appear in this list, starting at 1. You can add or remove columns using the "Add" and "Remove" buttons, or alter the order of the columns using the "Move Up" and "Move Down" buttons.
InstanceId is required. The first such column listed will be inserted into the PIB-INDEX property for the row object.
Step 4 - Adding or Removing Indexes
The final step in the Table Wizard for new tables is to edit the list of indexes for the table. Any columns that were marked as indexes in the preceding step will already be listed in the order they were added. Additional indexes from other tables can be added, existing indexes removed, or the specific order of the indexes changed.
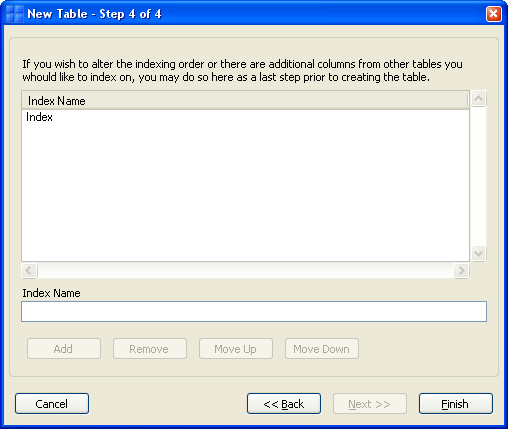
Figure - New Table Wizard - Step 4
Finishing
You can use the Back and Next buttons to go back and edit your work at any time prior to committing to your new table specification. Once you are satisfied with the skeletal structure you have defined, click the Finish button to proceed. MIB Smithy will then create the OBJECT-TYPEs for the table, row and columns, along with the type assignment defining the SEQUENCE structure, using all of the information provided. You can then use the normal project management facilities and workspaces to edit the properties for each of the new records to add descriptions, refinements such as range restrictions to certain columns, or add and remove columns to/from the table.